Showing posts with label sewing camp. Show all posts

Monday, December 3, 2012

Sewing Camp {October}

After some time off, we started up with Sewing Camp again. Sewing Camp (or more accurately Sewing Club but you cannot deny the fun at camp so I like the kitschy name) is a group of girls and their moms who gather together to sew- we sew fun things which teach a new skill or practice an old one. We all pitch in to pick projects and patterns and help the girls to work. We also make our own sometimes for more practice for ourselves. The best part of Sewing Camp, besides sewing with friends, is the cost. This is a materials and time only venture. And so worth our effort!

In October, we worked on the girls' patchwork tiered skirts from last summer. Some of the girls had to add some length, but in general it went very well.


This project lent itself very well to using a serger. Finished seams are so fun to make with a serger! We just finished Sewing Camp December (postponed from November) so I thought I'd better finally post about October.

R12 needs to add in her elastic waistband and she'll be modeling her creation soon. This month we worked on sewing caddies. We're hoping for an extra meeting over the holidays. She spent today working on a related project while the machine was still on our school table.


It's been enjoyable watching how independent the girls have become over the last year. We have some plans to make a batik among other fun adventures and we like to have the girls give input to project ideas. The most difficult part? Getting all the tastes and talents to agree on the next project!

Friday, September 28, 2012

Sewing Camp News & {How to Pull it Together}

We are set to begin sewing camp again next weekend. Our original start date was postponed due to much illness. I don't know about you all, but we have already had the first intense little cold this season. I think everyone is almost on the mend! The last one came down with it the other day and he is holding his own so far. We've been on break since the spring time because of the move. We are excited to get going again.

What happens at Sewing Camp? We host 5 other girls and their moms at our house to work on sewing projects. We have some fun things to try this year- in particular, I'm looking forward to making some batik fabric.

How do we decide what project to do? As you can imagine, blogland is full of ideas and sewing blogs to give you ideas. R12 and I also really enjoy the Craftsy platform and have purchased some classes to enjoy together and sometimes with our Sewing Camp crowd.

How often do we meet? With so many busy schedules, we've had success with Sunday afternoons after church once a month. It might be fun to meet more often, but we have one family who travels an hour to get here and other folks keep busier routines than we do. This works really well for all of us. We go from about 1-5pm. We usually serve a quick lunch and get started. Camp ends when it's time for two of the girls (and E14) to head to youth group.

How is Sewing Camp Set Up? We provide two sewing machines and a serger and another mom brings one or two machines and her serger. We set the machines up on tables and we have a cutting table as well. I put up some initial directions on our whiteboard/chalkboard and we explain how to get started. Then the girls just dive in and the moms give a assistance where we can. One mom is loaded with sewing skillz so we all get to learn from her!

Why Sewing Camp? I was looking for a way to get R12 together with other people who like to sew and to learn from others and with others without the big cost involved in taking classes. If you'd like to read more about how we pour into our children's passions, you can read about it in the 10 Days Series by the same name. Sewing Camp is a way for us to do that with R12 and her sewing at a more reasonable cost with some friends.

I have compiled all of our Sewing Camp posts into one place and you can find the button (like the picture above) in my left hand side bar. I'll continue to add to it and I hope you'll find it encouraging. I hope to share some ways to get started with sewing at home and maybe that's another great topic for a vlog post!

Saturday, February 25, 2012

Sewing Camp January!

As promised, I am posting about our Sewing Camp from January. The January edition was hosted by one of our campers. She chose a project for us and invited the girls sledding. With the serious lack of snow this winter season, the girls experienced a tiny snow miracle late that week and enough snow fell for the party!

The girls worked on pillow case dresses for the "Dress a Girl around the World Sew-a-long". The tutorial for the dress was from {lgb studio}. Information on what to do with the dresses once they are complete is found here. Pretty cool that we added a service component to our Sewing Camp!

Cutting the pattern...it was interesting to see what fabrics the girls brought. I don't think I saw any pillowcases.

I loved this little pattern.

The girls used sewing machines...

and sergers! They are getting to be pros on that little machine. This one is R's made from some scrap fabric and one of her old bed sheets that had lost elasticity!

March seems pretty busy for some of the campers, but I think we will press on with our once a month sewing. Read the post below if you missed the news on February Valentine's Camp. We are still in the throws of preparing our house to sell. My husband is working as hard as ever! Thank you Dan! And today as R11 was poking around the fabric bins while he was taking a break, she promised she would not make a mess! That is when he shook his head and marveled that we have three sewing machines in the house- well one is out for a tune up he said, but we have three! R11 corrected him. "Daddy (giggle), one is a serger!"

Yes, we have a serger! Stay tuned for news on that later. And in the meantime, my job around here is more the hoe out and make neat and trim portion of the operation. Therefore, I have work to do on organizing and stowing fabric while making it look amazing and accessible. All at the same time.

Friday, February 24, 2012

Sewing Camp Valentine's Style

The Sewing Camp we started last summer blazes on into the New Year! Last month we met at one of the other girl's homes and they made pillow case dresses for girls in Africa. I have some pictures on my phone from that event that I will share soon (the whole "preparing to move" thing is having unfortunate consequences for my blogging...I'll try to keep up!). In the meantime, have a look at our February camp time.

We took on two projects- most often the girls have several options on how to spend their time and they choose one to complete. Only, it seems that a lot of times they don't end up completing the longer ones. This time some girls wanted to make an Amish doll and others opted for the Valentine tshirt project.

Sometimes library books provide a nice project.

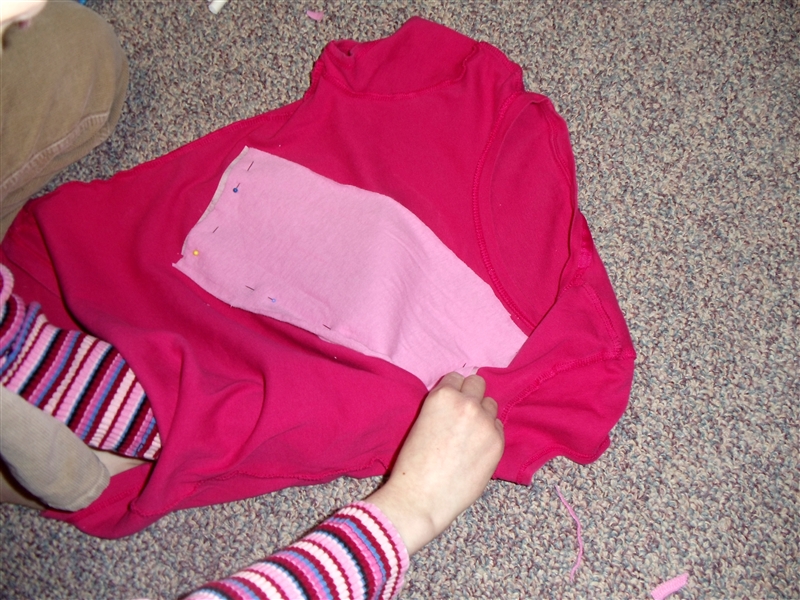
The shirt required some reverse applique. We attached some interfacing before doing any cutting.

The girls chose hearts to trace onto their shirts in various ways.

R11 went for a diagonal look.

They sewed along the traced chalk lines- a bit tricky.

This project was not as easy as some thought it would be!

Along with the interfacing, another layer of tshirt was attached and sewn on, so when you cut away the first layer, there was another one behind it.

Another camper tried piecing together the writing from one shirt onto another. She also tried another heart from the same blog- Make and Love It.

The shaggy heart project- doesn't that look like lettuce?

Sewing Camp has been a really fun time for us this year. I'm so thankful for the girls and their moms who have committed to getting together each month. March is coming right up so I'm on the lookout for a new project and of course those who chose the dolls will be working on those again.

I find that the best projects are those that can be finished on that afternoon- what a sense of accomplishment comes with completing something fun all at once!

Saturday, December 31, 2011

John the Owl

Just a little update on the "Lola Owls"...I9 finished his before the holiday. Check out this boy's skilz.

Look at I9 go! He just went right for those tight turns on the eyes.

and beak!


Finished side...then he sewed up a backing...

and stuffed him and hand sewed him up- with a tight little whip stitch. How cool is that? His name is John. John the Owl!

R11 was distracted with the gifts she was making, but hopefully we'll see a finished Lola from her as well. I9 received his own sewing kit for Christmas. I'll share what's in it very soon- in case any of you mamas of boys want to try it out!

PS- sorry for the blogging break...we were out of town, then back in town and Dan was doing some laptop maintenance for me including a full back up to our server and the installation of Office 2010 along with the usual updates. So, Happy New Year! I'm back in bloggy business!

Tuesday, December 20, 2011

Sewing Camp December

We had Sewing Camp December on the 18th this past Sunday and I had been excited to share our Fab Felt Holiday Craftsy Class by Betz White with the girls. We chose the Poinsettia Brooch project and it was a lot of fun to try. If you've never done a Craftsy class, I highly recommend them. Once you purchase the class it's yours forever to review and try and ask questions. More on these a bit later as a certain holiday is upon us and a certain girl will see more of this on Sunday. ; ) For now, here's the link to the Craftsy home page so you can see the classes they currently offer with prices and instructors. If you click Betz's link above, that will take you to her blog and she offers a link to her Craftsy classes for $10 off. In general the classes are about $30. They have samples of each of the classes and introductions to what you will learn. Once you register, you'll get emails on sales for the classes. I took advantage of a buy one, get one free this holiday season.

The first finished poinsettia- we did not have fusible webbing to attach the printed fabric to the petals first.

But some of the girls tried Tacky Glue and it worked fine- love this color combo and what a great button!
R11's brooch- I love the button in the middle. She forgot her printed fabric, but she was going to give it a go. There is hand sewing involved to make the leaves curved and then you use glue for assembly.

These are the materials we used minus the fusable webbing. I chose to go with the craft glue as well and just a little tip- for VBS I used the Discount School Supply craft glue which is Tacky glue in an old fashioned paste type bottle- with the stick and everything. You know how Tacky glue will gum up a squeeze bottle! The kids at VBS hate it so I use glue dots with them now, but it's perfect for home crafting. FYI- kids these days have issues with liquid glue! Too many neat alternatives for them to bother. What a shame!

My almost finished brooch- once dry I will sew the middle and the button to the flower. I was missing a petal- that's what happens when you start with a partially used template. I was missing a petal and did not know it. More of the green leaves show when you use all six, but it's tricky to get them all around at first.

We watched the video together as we assembled to get started and it was great instruction. If we needed to see a part over we could do that later and one camper did just that. I'm looking forward to using this format again not only for Sewing Camp, but for other times as well. I love that we can access the class anytime and from our home. We can do the project along with the instructor or just watch to get an idea of what to do before beginning again later.

Next month we'll be having two Sewing Camp events- one is a snow and sledding party with the opportunity to make pillowcase dresses for girls in third world countries and the other will be a normal project day - the project remains elusive at this moment.

This has been a terrific opportunity to gather R11's friends for an activity they all enjoy. It's a much cheaper option for sewing instruction and her classmates are her friends. The moms are on board and it's been an activity so worth our investment of time.

Monday, December 19, 2011

Sewing Camp November

It's been a while since I've blogged about Sewing Camp, but we've been busy. In November we met on the 19th and we made some Lola Owl Bags. This was a fun project- perfect for young sewing enthusiasts and we even had I9 join us this time. He's been sewing his own angry birds like crazy and we were missing some of the girls so this was a great day for him to join us on camp day.

Broken arm girl is working on sewing a wing- it gets a zig zag stitch over and over to make the decorative stitching around the wings.

Does this make a really fine looking Lola or what? I love her fabric choices!
E is our finished project friend. She goes home and finishes up anything she didn't get done during camp. She sent me this photo of her finished Lola Bag.

I9's color choices-  he worked on "guying up" Lola.

R's Lola- she's almost ready to assemble into a bag. My bag will be the opposite- the brown is the owl and the green will be the wings. I try to do most of the projects (but not all) just to get some practice in while working with the campers.

Yesterday we had our December Sewing Camp and some of the girls worked more on Lola and we even added Max, which I'll share with you next. This week we plan to finish up the Lola Bags as part of our Project School week. Hopefully we'll have some finished bags to share soon!

Saturday, October 22, 2011

Sewing Camp October- Boys Allowed!

Sewing Camp met on a Sunday a few weeks ago for our October date. The girls came over in the afternoon and we even had materials and time for some little brothers to join in on the fun.

R11 is working on her first apple.

J6 has been dying to try the sewing machine. He is standing working the pedal and I'm steering. A grand start to his sewing experience!

J6 has always been a fan of cutting. This was a bit tough, but he did well.

Just look at all this busy!

The girls worked on the skirts they began in August. We are in the home stretch!

Camper E13 made many apples of different styles and she made a garland with hers.

I9 did his own sewing which went very well. He's also been hand sewing up a storm and recently completed a nerf dart pouch and a stuffed cat. His stitches are looking pretty good.

The fall fabric stash...we picked this up at our favorite reuse sewing shop and it's provided a lot of fabric choices for fall sewing fun this season.

Our sewing pal, Mrs. R, had prepared these for her sewing school class and gave us the leftovers.

The finished product for R11.
I9's apples...he did a great job!

J6's apple- isn't that nice?

We put ours on the pencil tree in our dining room.

This was definitely a very successful Sewing Camp Sunday. I think the short project allowed the girls to be very independent and to finish a lot of different designs. I'm working on the planning for Sewing Camp November and I'm giving some different ideas consideration including another short, seasonal item in addition to some other projects.

Friday, October 21, 2011

October Sewing Camp Project

We've moved sewing camp to Sunday afternoons for the fall and winter. It worked out pretty well a few weeks ago. This time, with the help of a sewing friend, we did a short seasonal project that was really very satisfying. The process is called reverse applique and it was a lot of fun! Here's a peak at the process. I'll share the camp pictures next time.

First you need a pattern, two pieces of fabric (wrong sides together), and two pieces of felt. you can mix and match, but I left mine matching.


You sew it all together right on top of the pattern line and pull away the pattern. That part is pretty cool.

You are left with this and you can begin cutting away around the outside leaving about a quarter inch outside the seam.

Then you cut away the felt on the inside making sure not to clip the fabric underneath- leave the quarter inch beyond the same to make that nice border. I also cut leaves from the scrap felt.

Next, I zig-zagged on the string which is a strip of tshirt- you just cut the strip from a shirt and you stretch it and it rolls like that. Very fine way of reusing old tshirts.

Next up is the leaf- I didn't do veins on this particular one, but in the next post you'll see some creative leaves from our campers.
Another choice of colors- we had plenty of choices that day, you'll see!

Two finished apples!

But then I got to thinking about how cool it would be to make a pumpkin the same way...

We're off to a good start!

Well...it sorta looks like a 1970s Christmas bulb ornament, but I did my best to dress it up with raffia and a cinnamon stick. It was an improvement, but only by a little! Some adjustments would be necessary to make this work well.

Stay tuned for some pictures of Sewing Camp Sunday! I'm already planning for our November Sewing Camp Sunday. Lately the girls have been choosing various projects. I'll share some ideas soon. Sewing Camp has been worth every bit of effort on my part. The girls are having fun and I always have a friend to help and the cost is just for materials- which is almost the best part.